As an Amazon Associate, we earn from qualifying purchases. Some links on this site are affiliate links at no extra cost to you. Our recommendations are based on thorough research and editorial judgment.

How To Service A Cassette Hub Driver?
To service a cassette hub driver, we start by gathering tools like a cassette lockring tool and chain whip. Next, we disassemble the hub by unthreading the axle and removing the freehub body to clean the pawls and springs. After soaking the parts in degreaser, we lubricate them lightly and reassemble everything. Finally, we check chain tension and make certain smooth engagement. Stick with us, and we’ll walk you through all the details step by step!
Key Takeaways
- Disassemble the hub by unthreading the axle and removing the driver; clean all debris for effective maintenance.
- Soak freehub parts in degreaser and use isopropyl alcohol for thorough cleaning, inspecting for damage during the process.
- Lubricate pawls and bearings lightly after cleaning, then reassemble the components ensuring proper spacing with shims if necessary.
- Install seals correctly, ensuring flat seating and using appropriate tools, then reattach the lockring and axle components without cross-threading.
- Finalize adjustments by checking chain tension, inspecting for smooth engagement, and testing for proper drive function without slipping.
Preparation and Tools Needed
You may be interested


Getting ready to service a cassette hub driver? We need to start with a clean, well-lit workspace. A tidy area prevents contamination and helps us see what we’re doing! Let’s grab a stable workbench to secure our bike and lay out all our tools systematically. Tool organization is essential; we can’t afford to lose tiny items like pawls and springs!
We’ll need some key tools like a cassette lockring tool, chain whip, and a soft face mallet. Don’t forget shop towels for cleanliness and isopropyl alcohol to clean components. And gloves! They keep our hands clean and protect us from sharp bits. With everything in place, we can plunge into the fun part—servicing our hub driver together! Additionally, ensure that all components are compatible, as mixing different brand axles may lead to compatibility issues with your setup.
Recommended Products

QUALITY DESIGN - Hydra Classic mountain hubs are loaded with features every rider will appreciate such as revolutionary 0.52° engagement, generously low weights and an intuitive layout that can be serviced without any proprietary tools.

High-performance rear hub built for durability and precision, made from forged 2014 T6 aluminum billet for increased stiffness and lightweight efficiency.

Enhanced durability with a forged 2014 T6 aluminum billet hub shell, offering increased stiffness and lightweight performance for aggressive riding styles.
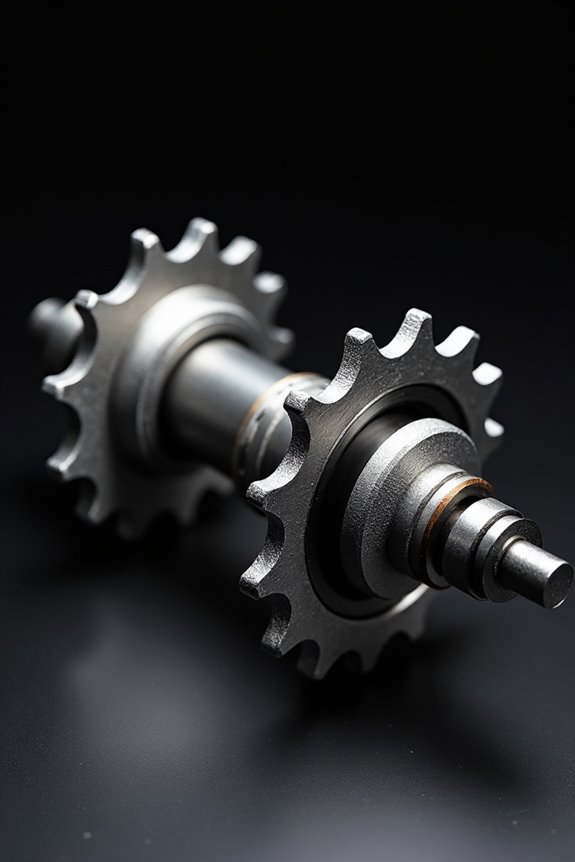
Disassembly of the Hub

Let’s jump into disassembling the hub! First, we’ll unthread the axle by turning it counterclockwise on the drive side and then pull it out from the non-drive side. Next, we want to clean any debris between the driver and the hub shell—this is essential for effective hub maintenance!
Now, firmly tug the driver or freehub body to remove it from the hub shell. If we’re feeling adventurous, we can slide out the pawls and springs for a good clean. Don’t forget to check the seals for dirt! When we finish disassembly, we’ll be all set for a thorough inspection, ensuring our freehub function remains smooth and efficient. Regular checks on brake cable tension can further enhance our overall bike performance. Let’s keep it clean and ready for reassembly!
Recommended Products

Internal gear hub maintenance oil dipping set

Adult Unisex Cycling Oils
Designed with precision 8620 steel and a durable zinc finish, this E-bike hub drive cassette remover offers long-lasting performance and corrosion resistance for professional bike maintenance.
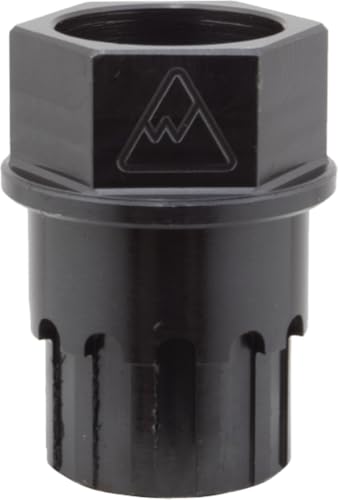
Removing End Caps
When we’re ready to tackle removing end caps, it helps to be prepared! Let’s gather our tools: a couple of flathead screwdrivers, maybe some rubber gloves for grip, and if needed, a blind bearing puller. Different end cap types may require us to use specific installation techniques.
We can start by wedging two screwdrivers on opposite sides to pry them off. If they’re especially stubborn, let’s tap the axle lightly or twist the screwdriver in the circlip gap. Remember to secure the wheel firmly so it doesn’t move! Once they’re off, we should clean and inspect everything for wear or damage. Keeping track of any washers or spacers is essential for a smooth reassembly. Additionally, ensuring that high-quality materials are used in the hub will contribute to its overall durability. We’ve got this!
Recommended Products

High-performance 240 MTB Rear Hub with 32h build for enhanced durability and strength.
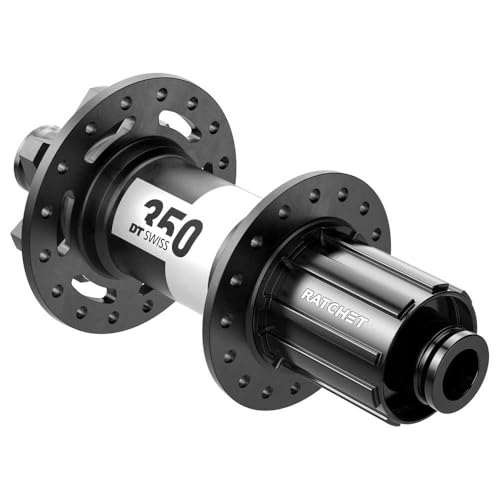
High-performance 350 Rear Hub featuring the innovative Star-Ratchet system for reliable, maintenance-free operation.

Enhanced durability with the SRAM 900 Rear Hub featuring a four-pawl Double Time engagement mechanism for rapid power transfer and quick acceleration
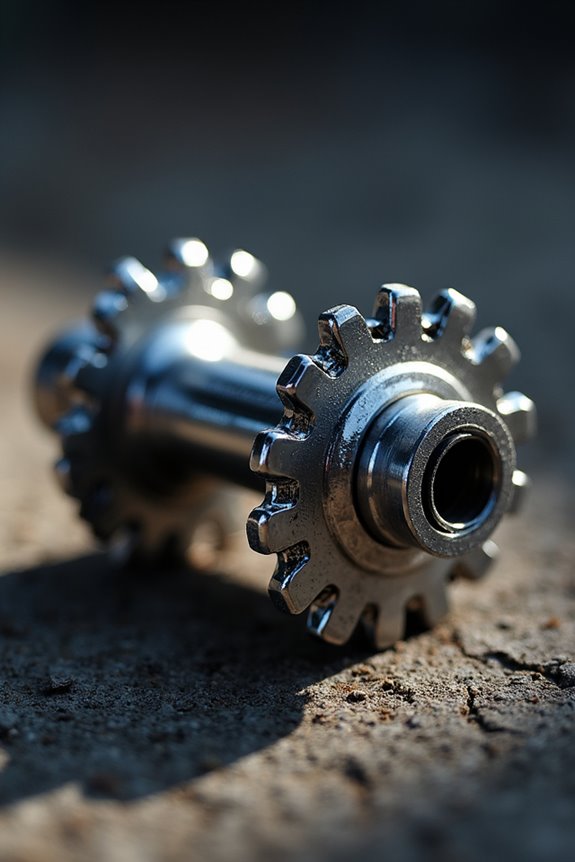
Freehub Body Removal

Freehub body removal is a key step in servicing your cassette hub! First, we’ve got to take off the rear wheel and then the cassette. We’ll use a chain whip and a lockring tool for that. Once that’s done, we remove the axle, keeping an eye on any spacers or washers.
Now, here’s the fun part! We’ll use a large Allen wrench to unscrew the freehub body. Remember, freehub compatibility matters, so check your design! We’ll gently slide or unscrew the body off the hub shell. Inside, let’s inspect those bearings and ratchet teeth—this is essential for the engagement mechanism to work smoothly. If anything’s worn, it might be time to think about replacing the whole freehub. Additionally, ensuring that the axle types are correctly matched is crucial for seamless installation and optimal performance.
Recommended Products

High-performance 3-degree engagement with Industry Nine's innovative six-pawl mechanism for rapid power transfer and precise acceleration.

Safely Removes Frozen Hub Assemblies. U.S. Patent 12,358,107

20PCS Hub Puller Kit: Orion Motor Tech's wheel puller tool kit includes 5 adjustable legs, a hydraulic ram, and 14 other essential pieces to help you quickly and easily remove wheel hubs on trucks. Ideal for quick roadside fixes or busy repair shops
Pawl Disassembly

Now that we’ve got the freehub body out, let’s take a closer look at the pawls! These small, spring-loaded levers are vital for how our bike freewheels. There are different pawl types, but they all work together to engage with the ratchet ring and improve our ride’s responsiveness.
To disassemble the pawls, we gently pry off any seals to expose them. They’re held in place by tiny springs, so let’s be careful not to let those fly away! As we check for pawl wear, we’ll look at the tips and engagement surfaces for signs of damage. It’s essential to guarantee they move freely—if they don’t, it’s time to replace them. Remember, just like ankle guards provide support for athletes, ensuring our pawls function properly will keep our ride smooth!
Cleaning and Inspection of Parts
Cleaning the parts of our cassette hub driver is super important for keeping everything running smoothly! First, let’s soak those disassembled freehub body parts in a degreaser. This helps to remove old grease and grime using effective cleaning techniques. For detailed spots, we can grab isopropyl alcohol and a soft brush, like a toothbrush, to get into those tricky corners.
Now, it’s time for inspection methods! We’ll carefully inspect bearings, axle threads, and seals for any damage or dirt. Checking spacers guarantees they fit right. Let’s keep an eye out for scratches or wear on the ratchet ring and driver teeth, too! Additionally, ensuring the teeth design on your chainring is well-maintained can prevent performance issues in the future. Finally, remember to clean everything thoroughly and verify it’s dry before putting it all back together!
Pawl and Bearing Cleaning
When we immerse ourselves in pawl and bearing cleaning, it’s all about attention to detail! First, let’s gently pull out the pawls, which are made from durable pawl materials. We’ll want to keep track of those tiny pieces! Once removed, placing them in isopropyl alcohol helps us clean them well.
Next, using a soft brush with high-concentration alcohol or a mild degreaser, we scrub away any old lubricant and dirt. Remember, lubrication types matter! For smooth engagement, light oil will work wonders on pawls. If we’re in a pinch, a tiny dab of grease can help, but let’s avoid too much to keep everything clean.
With our parts sparkling, we’re on our way to a smooth ride!
Hub and Cassette Inspection
After getting our pawls and bearings all cleaned up, it’s time to take a close look at the hub and cassette. Regularly checking for cassette wear helps maintain our drivetrain efficiency, so let’s keep an eye on those cogs!
Start by looking for hooked or sharpened teeth, which signal it’s time for a change. We can also use wear indicators for early detection. Listening for unusual noises when we spin the wheel can help identify freehub issues.
While we inspect, let’s check for lateral play. Any excessive movement means we might have a problem. Don’t forget to assess spacers and verify everything’s properly seated. Keeping our components in good shape will avoid accelerated chain wear and keep our rides smooth!
Reassembly of the Hub
Reassembling the hub can seem tricky, but it’s actually pretty straightforward once we grasp what to do! First, let’s slide the bearings onto the axle. If we need spacing control, we can add shims. Don’t forget the cone spacers for proper bearing alignment! Now, insert the axle through the non-drive side of the hub shell.
Next, we carefully replace the pawls and springs in the driver. If they’re stubborn, a slim screwdriver can help. We’ll know we’ve achieved driver engagement when we hear that satisfying “click” as we spin it backward.
Lastly, we’ll tighten the axle hardware gradually. It’s all about that sweet spot—tight enough to prevent play, but not too tight, so we stay smooth!
Lubrication Techniques
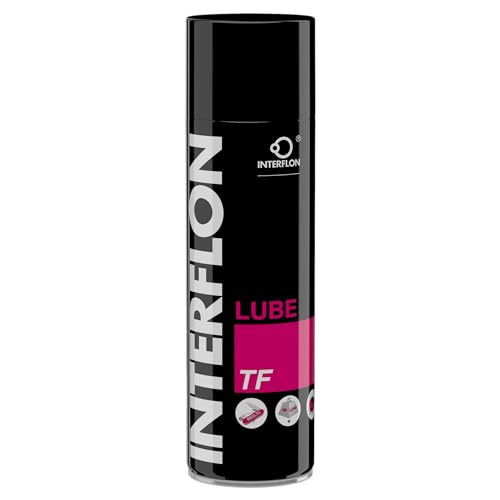
Now that we’ve got the hub all put back together, it’s time to talk lubrication techniques! Choosing the right lubrication methods is key for smooth functioning. We prefer dry-film lubricants with Teflon for pawls and pockets. They reduce friction without attracting dirt. Light oils like 10wt oil work great, too—just a few drops will keep things running smoothly!
When applying lubricant, a tiny drop on each pawl is all you need. Remember, less is more! After that, spin the freehub body backward to evenly spread it out. Finally, let’s avoid thick greases—they can cause issues. By selecting the right lubricant, we’re keeping our cassette hub in top shape for the rides ahead! Happy cycling!
Recommended Products

Provides superior, long-lasting lubrication for every household lubricant need
PREMIUM INDUSTRIAL DRY FILM LUBRICANT - Highly versatile, industrial quality dry film lubricant with MicPol Technology. Forms a highly durable lubrication film that virtually eliminates wear on moving parts. The dry film does not attract dirt.

Keep your equipment running smoothly with long-lasting corrosion protection. This Dry Lube PTFE Spray reduces friction and wear on blades and bits, door and window tracks, slides, conveyor belts, rollers, hinges, power tools, and equipment
Installation of Seals
When we install seals in a cassette hub, it’s super important to get it right! First, we need to choose the right seal materials and designs to match our hub. After removing the old seal, we clean the area to guarantee a perfect fit.
When placing the new seal, make sure the groove faces away from the driver body. This keeps the pawls happy and functional! We can use a seal installation tool to press it in evenly, avoiding any deformation.
Don’t forget to check its seating by flipping the wheel to see if it’s flush. A well-installed seal helps keep dirt out and guarantees smooth rotation. Let’s make sure everything’s perfect! Happy cycling!
Tightening Components
Tightening components in a cassette hub is essential for smooth cycling! We need to confirm that everything is perfectly aligned. First, let’s grab our tools: a cassette socket, a chain whip, and a torque wrench. Remember, we apply around 10Nm for lockrings, following proper torque specifications to avoid mishaps.
When tightening, hold the cassette steady with the chain whip. Then, loosen the lockring by turning it left, and snug it back on without cross-threading—easy does it! For cone nuts, hand-tighten first, then use a cone wrench and hold the axle with a hex wrench. Once we feel the resistance, it’s just right! Finally, check for smooth spinning; we’re almost there! Happy servicing!
Adjustment of Chain Tension
Adjusting chain tension is super important for keeping our bike running smoothly! It helps prevent chain slack and guarantees our drivetrain alignment stays on point. First, let’s shift to the lowest gear for easier cable tension management. We’ll apply slight tension to the shift cable—not too tight—before securing its clamp.
Next, we loosen the non-drive side axle nut, allowing movement of the rear wheel within the dropouts. This helps us adjust chain tension evenly. After that, we’ll gradually tighten the drive side axle nut while making sure the chain isn’t overly tight.
Finally, we can check for slight movement in the chain to confirm ideal tension. With everything in place, we can enjoy a smooth ride free from skipping or derailment!
Final Testing and Check
Ready to guarantee our cassette hub driver is in top shape? Let’s jump into the final testing and check! We’ll start with a visual and functional inspection. We should verify that the driver engages smoothly, spins freely backward, and has no visible damage.
Next, let’s perform the engagement and drive test. A quick spin test will show if we hear those satisfying engagement clicks! We need to ascertain there’s no slipping under torque.
Don’t forget to check for bearing and axle stability. A little wobble means trouble!
Finally, let’s do our final spin to confirm everything’s functioning perfectly. We need that functional verification so we can hit the road with confidence! Our driver is ready to roll!
Maintenance and Troubleshooting Tips
After that thorough final check, we’re all set to keep our cassette hub driver running smoothly! Let’s plunge into some preventive maintenance practices. Regularly cleaning our hub and driver before grime builds up is key. We should inspect seals and end caps for wear too!
If we notice sluggish shifting, it’s time for some troubleshooting techniques. Cleaning the pawls can work wonders! Also, replacing damaged spacer washers will help maintain proper spacing. Remember to check the tension of pawl springs—if they’re weak, we’ll feel that dreaded slip.
Lastly, let’s keep an eye on our cassette torque to guarantee a secure fit. With these tips, we’re well on our way to enjoying smooth rides ahead!
Frequently Asked Questions
How Often Should I Service My Cassette Hub Driver?
We recommend establishing a maintenance schedule based on your riding conditions. For most of us, servicing frequency should be every 3 to 12 months, depending on the environment, to keep our cassette hub drivers performing at their best.
What Signs Indicate My Hub Needs Servicing?
When our hub starts singing with unusual noise or feels like rough rotation, it’s time for a heart-to-heart with our gears. We shouldn’t ignore those signs they’re desperately whispering for some tender care.
Can I Use Any Grease for My Hub?
No, we shouldn’t use just any general grease types for our hubs. Let’s stick to specific recommendations for ideal hub performance. Following hub maintenance tips guarantees smooth riding and keeps our bike components happy and long-lasting.
How Do I Know if My Bearings Are Worn Out?
We can tell our bearings are worn out by watching for wear indicators like rough spinning, excessive play, or unusual noises. Familiarizing ourselves with different bearing types helps us recognize when they need attention.
What Tools Do I Need for a Cassette Hub Service?
For our cassette hub service, we’ll need essential tools like a universal hub tool, bearing installation kits, and proper lubricants. Let’s guarantee effective hub maintenance and driver lubrication for smooth rides together—safety and performance matter!