As an Amazon Associate, we earn from qualifying purchases. Some links on this site are affiliate links at no extra cost to you. Our recommendations are based on thorough research and editorial judgment.

How To Film BMX Edits On A Budget?
Filming BMX edits on a budget is totally achievable with the right gear! We can grab affordable cameras, like the Canon EOS 550D, and budget lenses to catch those sick tricks. Setting up your shots is key, so let’s use tripods and DIY mounts for unique angles. Don’t forget good audio—cheap mics or even our phones work great! With some editing finesse, like jump cuts and color grading, we can create awesome videos. Stick with us for more tips!
Key Takeaways
- Choose affordable camera options like the Canon EOS 550D or 600D for quality footage without breaking the bank.
- Utilize budget-friendly lenses, such as vintage 28mm or Rokinon fisheye lenses, to capture dynamic BMX action.
- Implement DIY mounts for unique filming angles and use Bluetooth remotes for easy solo recording.
- Record audio separately with budget microphones or smartphones to enhance sound quality in your edits.
- Utilize free editing software like DaVinci Resolve to achieve professional results while keeping costs low.
Choosing Affordable Camera Equipment
You may be interested
When we’re diving into BMX filming on a budget, picking the right camera equipment is super important! For starters, affordable cameras like the Canon EOS 550D or 600D are great entry-level DSLRs. You can often find these for around $150. If you’re up for a bit more, check out the Panasonic Lumix GH5 or Fujifilm X-T3 for amazing 4K footage!
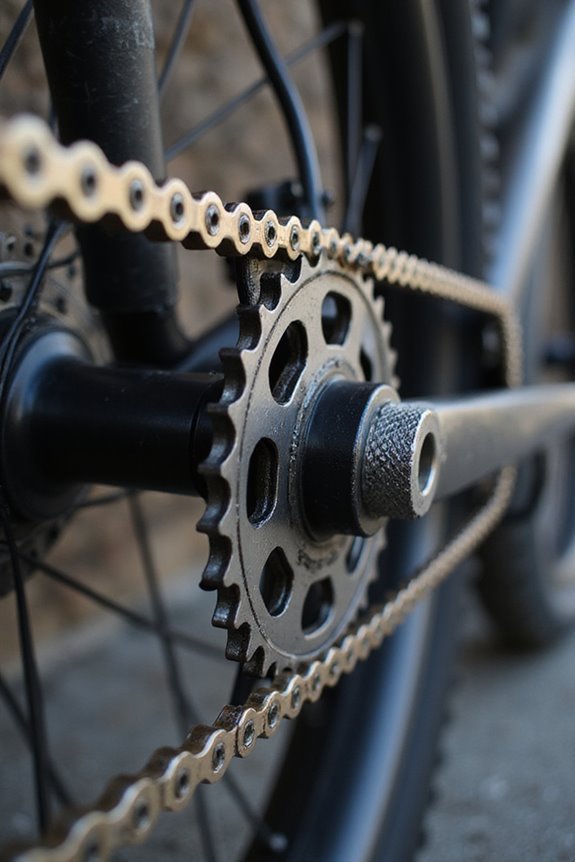
Next, let’s talk budget lenses! A vintage 28mm f/2.8 might only cost $20, or you could snag a Rokinon 8mm fisheye lens for about $250. These lenses are perfect for capturing those epic BMX tricks! Additionally, different padding options in BMX seats can help enhance comfort during long filming sessions as you capture those thrilling moments. So, let’s keep our eyes peeled for great deals and make some awesome BMX edits together!
Recommended Products

Point and Shoot Long Zoom Camera: 18.1 megapixel MOS sensor plus 60X zooms DC Vario lens (20 1220 millimeter and Power O.I.S. (Optical Image Stabilizer) captures far off moments

5K Ultra-HD & 130° Wide-Angle Lens:This camera records in stunning 5K resolution, capturing every detail of your ride, from the texture of the road to distant landscapes. The 130° wide-angle lens ensures a broad field of view, making it ideal for outdoor adventures, cycling, diving, and action sports. Whether you're recording a fast-paced bike trip or a scenic hike, the clarity and coverage help you document each moment with precision

𝐒𝐩𝐞𝐝𝐚𝐥 𝐒𝟏: 𝟒𝐊 𝐔𝐇𝐃 𝟑𝟎𝐟𝐩𝐬 + 𝐏𝐫𝐨 𝟔-𝐀𝐱𝐢𝐬 𝐒𝐭𝐚𝐛𝐢𝐥𝐢𝐳𝐚𝐭𝐢𝐨𝐧 – Capture stunning 4K Ultra HD video with advanced 6-axis EIS stabilization for smooth, shake-free footage on mountain trails, city roads, or e-scooter commutes—ideal for action recording, accident evidence, and social-media videos; supports 4K/2.7K/1080P.
Self-Filming Techniques and Equipment
Essential Gear
Let’s start with smartphone tripods to stabilize our shots. Bluetooth remotes are lifesavers for starting and stopping recordings solo. DIY mounts let us attach our phones or cameras to rails or even bike parts for cool angles! Clip-on fisheye lenses can really enhance our perspectives, too. Additionally, ensuring your BMX bike has high-quality brakes will improve safety while filming tricks.
Filming Techniques
Using handheld gimbals keeps our shots smooth. Pre-visualizing trick direction helps us select the best angles to capture the action. Don’t forget to experiment with low angles for added drama! With these techniques, we’re set to make some incredible BMX edits without breaking the bank!
Audio Recording on a Budget
Audio recording on a budget can be easier than you think! To kick things off, we can use budget microphones like lavalier mics. They’re perfect for capturing clear voices without breaking the bank. Plus, smartphones come in handy as convenient audio recorders.
Don’t forget about USB mics! They connect right to our computer for quality recordings, and free apps like Audacity help us edit.
When filming, let’s aim for quiet spaces to avoid pesky background noise. Headphones are a must, making sure we catch any audio issues right away.
Recording audio separately from video also enhances audio quality, giving us more control during editing. Additionally, using a bike that is lightweight for handling can help improve the overall filming experience. So, with some creativity and the right tools, we can create awesome BMX edits!
Recommended Products

Compact & Portable: This dji mic easily slips into your pocket or bag, making it perfect for travel vlogs, street interviews, or spontaneous content creation on the move

Warm, detailed, distortion-free sound with excellent speech intelligibility

Includes: 2x Transmitters, Receiver, Charging Case, Camera Audio Cable (3.5mm TRS), Mobile Phone Adapter (Type-C), Mobile Phone Adapter (Lightning), 2x Windscreens, 2x Clip Magnets, Carrying Pouch, Hot Shoe Adapter, Charging Cable, DJI 1 Year Limited Warranty, 2X Turnstile Omnidirectional Condenser Lavalier
Camera Settings for Best Video Quality
Getting the best video quality for our BMX edits can really take our footage to the next level! First, let’s set our resolution to at least 4K, or even 5.3K if possible. A frame rate of 60 FPS keeps the action smooth, and if we want slow-motion, 120 FPS is perfect—just remember to lower the resolution a bit for clarity.
Now, let’s talk about those camera settings! Use a ‘Linear’ lens to reduce distortion and keep our riders looking natural. Keeping a high shutter speed freezes movement, while manual focus guarantees sharp shots. Don’t forget color grading too—pick a ‘Vibrant’ color profile so our BMX tricks pop! With these settings, we’re all set for epic edits! Additionally, consider the safety measures that enhance the overall experience for both riders and spectators at BMX shows.
Editing BMX Footage Economically
When we plunge into editing our BMX footage, it’s easy to feel overwhelmed, especially if we’re on a tight budget. But don’t fret! We can use free video editors like DaVinci Resolve or Lightworks to achieve professional results without spending a dime.
To keep our edits lively, let’s utilize jump cuts and sync clips with background music beats—this technique enhances the editing rhythm and keeps our audience engaged. We can add simple shifts like fade-ins and fade-outs for a polished look without resorting to fancy budget video effects. Additionally, drawing inspiration from community events and charity rides can give our edits a unique flair that connects with the BMX culture.
Recommended Products

[CPU] AMD Ryzen Threadripper PRO 9955WX (16 Cores, 32 Threads, 4.5 GHz Base Clock Speed up to 5.4 GHz Max Boost Clock Speed) delivers unmatched reliable full spectrum performance with enterprise class security features, manageability, and unrivaled expandability. | [STORAGE] 2TB PCIe NVMe Gen5 M.2 SSD - Experience Hyper-Fast Bootup and Data Transfer thats up to 30x Faster Performance than a Traditional Hard Drive. Store all of your files on the included 3TB 7200rpm 3.5" Hard Disk Drive.
【Upgraded】Seal is opened for upgrade only, 1-Year warranty on Upgraded RAM/SSD from Snow Bell, and original 1-Year Manufacture warranty on remaining components. 【18" QHD+ 240Hz Display】From the expansive landscapes of open worlds to the heart-pounding action of fast-paced gameplay, every visual element is enhanced with stunning clarity and vibrant colors.

CANON USA AUTHORIZED - INCLUDES FULL USA WARRANTY | Pursue Imaging Excellence - The Canon EOS R5 Full Frame Mirrorless Camera features an all-new 45 MP CMOS sensor, 8K DCI video, Dual Pixel CMOS AF II, in-body image stabilization and more, the EOS R5 offers incredible imaging performance for portraits, landscapes, wildlife, cinematography and everything in between.
Filming Location and Planning
Now, let’s talk about session scheduling. It’s best to shoot during off-peak hours to dodge crowds. We should map out our shots beforehand to save time and avoid filming the same trick too many times. Check the weather, too! This way, we’ll catch that perfect light and keep everything running smoothly. With some careful planning, we can create amazing BMX edits without breaking the bank! Additionally, selecting a filming location that accommodates suitable for tricks and stunts can enhance the visual appeal of our edits.
Tips for Stable and Smooth Shots
Filming BMX edits means getting those smooth, stable shots that really showcase the action! To achieve this, we can start using some handy handheld techniques. Keep your elbows tucked and grip that camera with both hands! Move smoothly and anticipate the rider’s next move.
Stabilization gear is our best friend. Affordable handheld stabilizers, tripods, or even DIY rigs made from bike parts can help reduce shake. For extra stability, consider gimbals or chest mounts with built-in stabilization.
Remember to maintain a balanced posture while filming. Slow, deliberate panning can make all the difference. If we treat our camera like a dance partner, we’ll capture stunning shots that highlight those incredible BMX tricks! Let’s get filming!
Recommended Products

2nd-Gen Native Vertical Shooting - Camera gimbal stabilizer, just release the horizontal plate and secure it into the vertical position for an effortless switch to vertical social content.
Shoot smooth, handheld, anywhere: Use solo for run-and-gun shoots or pair with optional body-mount arm and vest support for extended takes. Storage bag and 16 counterweight plates included with delivery
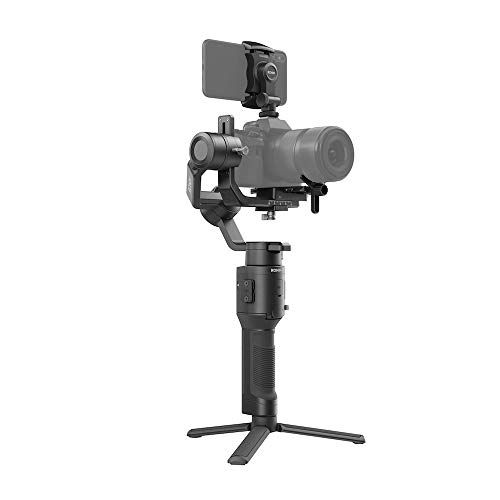
Lightweight and Compact - Opening possibilities for filmmakers and content creators in almost any situation, Ronin-SC was built to go anywhere.
Maximizing Your Equipment’s Potential
Maximizing our equipment’s potential is key to getting great BMX edits on a budget! Let’s explore!
Optimizing Settings
We should adjust our camera settings—aim for at least 60 fps for smooth slow motion. Use modes like 1080p or 4K based on lighting. This helps in maximizing quality without fancy gear!
Stabilization
Don’t forget built-in stabilization! If we lack a gimbal, popular free apps can do wonders.
Manual Control
Let’s go manual! Adjust exposure, focus, and ISO to fit the BMX action. It’s all about getting that perfect shot!
Lenses
Lastly, using different lenses or attachments can diversify our shots. A wide-angle lens might be just what we need!
Utilizing Lighting to Enhance Footage
Once we’ve got our equipment optimized, it’s time to shift our focus to lighting. Good lighting can completely transform our BMX edits!
Affordable Lighting Equipment
We can use LED panel lights for soft illumination or budget bi-color LED lights like the Godox ML60II Bi to get quality without breaking the bank. DIY softboxes from materials we already have can help soften harsh light too!
Lighting Techniques
Placing a key light at a 45-degree angle adds depth, while a fill light softens shadows. Utilizing natural light during golden hours gives a warm glow, and streetlights can add adventure to our night shots.
Creative Angles and Perspectives
When we’re out capturing BMX action, one of the most exciting ways to spice up our edits is by playing with creative angles and perspectives! Let’s explore some tips together.
Dynamic Angles
Using wide-angle lenses helps us get close to the action while showing the whole scene. We can create awesome tracking shots by starting from one side and following the rider to the other.
Low Perspectives
Filming from ground level makes tricks look epic! Using tools like handheld stabilizers lets us get those smooth, low shots that showcase height and movement.
Immersive Details
Don’t forget the surroundings! Capturing unique angles of ramps and bike parts adds depth. Mixing these techniques keeps our edits lively and engaging for viewers! Let’s make our BMX films unforgettable!
Organizing Your Filming Workflow
After we shoot, let’s quickly transfer files into our storage solutions. Using tools like Dropbox for team collaboration keeps everything centralized and organized. Plus, implementing version control guarantees we don’t accidentally overwrite any files. Finally, regular project archiving protects against data loss. With a little effort upfront, we can optimize our workflow and make editing a breeze! Let’s get to it!
Frequently Asked Questions
What Gear Is Essential for Beginners Filming BMX?
For beginners filming BMX, we recommend starting with a DSLR like a Canon or a point-and-shoot. Essential accessories include a wide-angle lens, tripod, and extra batteries to guarantee we capture those thrilling moments flawlessly.
How Can I Improve My BMX Filming Skills?
Did you know 80% of impactful BMX edits rely on dynamic camera angles? We can improve our filming skills by mastering these angles and closely studying BMX techniques, ensuring we capture every thrilling moment with style and clarity.
Where Can I Find BMX Filming Tutorials?
We can find BMX filming tutorials on YouTube, offering great resources for BMX filming techniques and video editing. Let’s explore channels that teach us how to film and edit our BMX adventures skillfully together!
What’s the Best Way to Store My Footage?
To store our footage, let’s think of external hard drives as vaults and cloud storage as our safety net. We’ll keep everything organized and secure, ensuring we can access our cherished memories anytime.
How Do I Promote My BMX Video Edits?
To promote our BMX video edits, we should leverage social media platforms, creating engaging content while collaborating with fellow riders. By sharing in niche communities and encouraging interaction, we can build a loyal audience together.